Module MAPLEAF.V&V.NASADraglessSphere
6/6 tests passed 6 plots generated
Plots:
XVel
Y
X
Z
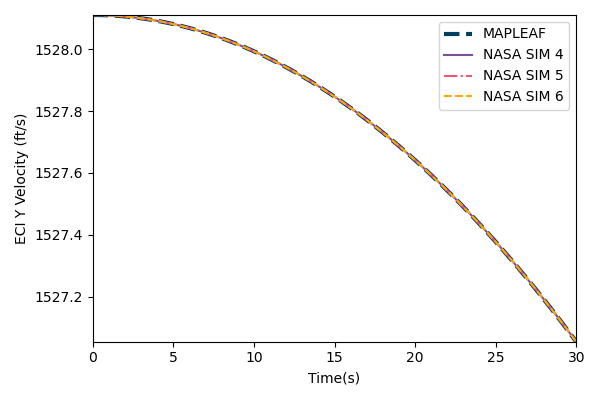
YVel
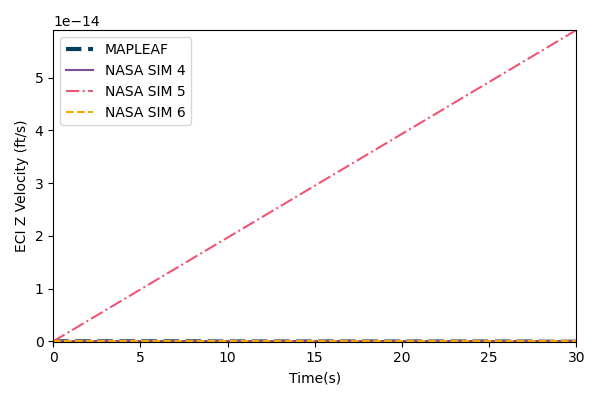
ZVel
Console Output:
Running Case: NASADraglessSphere
Full Flight Case
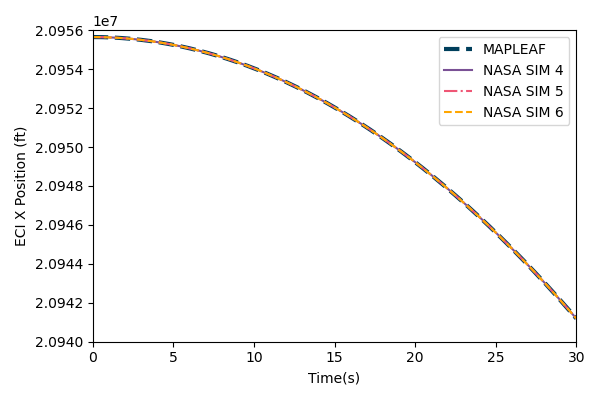
PositionX(m): ok 6.382876e+06
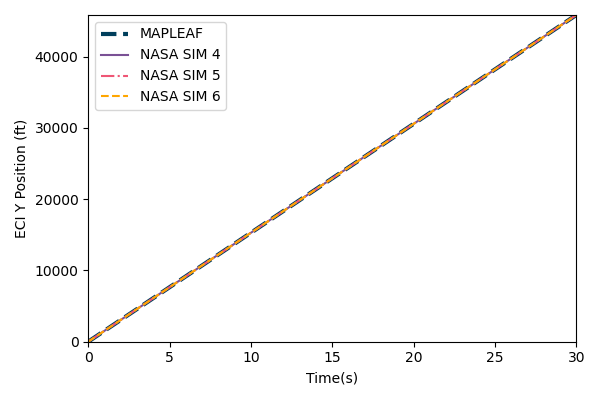
PositionY(m): ok 13969.82
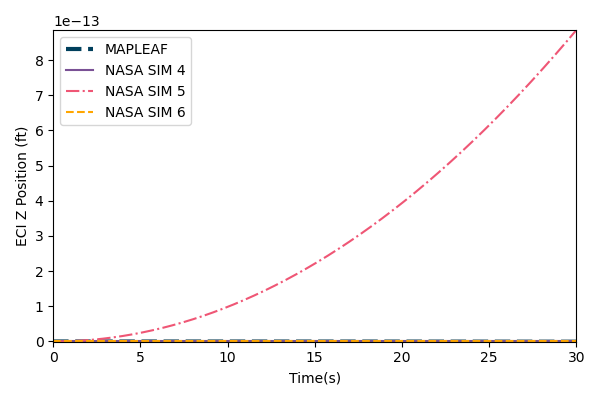
PositionZ(m): ok 0.0
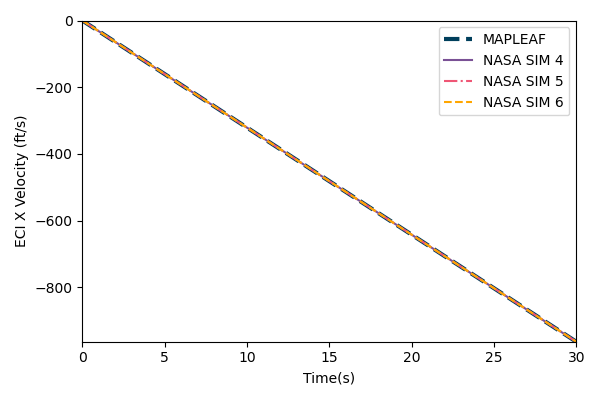
VelocityX(m/s): ok -293.7167
VelocityY(m/s): ok 465.4464
VelocityZ(m/s): ok 0.0
Saved Image: MAPLEAF/Examples/V&V/NASADraglessSphere/XVel.png
Saved Image: MAPLEAF/Examples/V&V/NASADraglessSphere/XVel.pdf
Saved Image: MAPLEAF/Examples/V&V/NASADraglessSphere/Y.png
Saved Image: MAPLEAF/Examples/V&V/NASADraglessSphere/Y.pdf
Saved Image: MAPLEAF/Examples/V&V/NASADraglessSphere/X.png
Saved Image: MAPLEAF/Examples/V&V/NASADraglessSphere/X.pdf
Saved Image: MAPLEAF/Examples/V&V/NASADraglessSphere/Z.png
Saved Image: MAPLEAF/Examples/V&V/NASADraglessSphere/Z.pdf
Saved Image: MAPLEAF/Examples/V&V/NASADraglessSphere/YVel.png
Saved Image: MAPLEAF/Examples/V&V/NASADraglessSphere/YVel.pdf
Saved Image: MAPLEAF/Examples/V&V/NASADraglessSphere/ZVel.png
Saved Image: MAPLEAF/Examples/V&V/NASADraglessSphere/ZVel.pdf
Expand source code
"""
6/6 tests passed
6 plots generated

## Plots:
XVel
<div><img src="https://raw.githubusercontent.com/henrystoldt/MAPLEAF/documentation/V%26V/NASADraglessSphere/XVel.png?raw=true"/></div>
Y
<div><img src="https://raw.githubusercontent.com/henrystoldt/MAPLEAF/documentation/V%26V/NASADraglessSphere/Y.png?raw=true"/></div>
X
<div><img src="https://raw.githubusercontent.com/henrystoldt/MAPLEAF/documentation/V%26V/NASADraglessSphere/X.png?raw=true"/></div>
Z
<div><img src="https://raw.githubusercontent.com/henrystoldt/MAPLEAF/documentation/V%26V/NASADraglessSphere/Z.png?raw=true"/></div>
YVel
<div><img src="https://raw.githubusercontent.com/henrystoldt/MAPLEAF/documentation/V%26V/NASADraglessSphere/YVel.png?raw=true"/></div>
ZVel
<div><img src="https://raw.githubusercontent.com/henrystoldt/MAPLEAF/documentation/V%26V/NASADraglessSphere/ZVel.png?raw=true"/></div>

## Console Output:
    Running Case: NASADraglessSphere
      Full Flight Case
      PositionX(m):             ok          6.382876e+06
      PositionY(m):             ok              13969.82
      PositionZ(m):             ok                   0.0
      VelocityX(m/s):           ok             -293.7167
      VelocityY(m/s):           ok              465.4464
      VelocityZ(m/s):           ok                   0.0
      Saved Image: MAPLEAF/Examples/V&V/NASADraglessSphere/XVel.png
      Saved Image: MAPLEAF/Examples/V&V/NASADraglessSphere/XVel.pdf
      Saved Image: MAPLEAF/Examples/V&V/NASADraglessSphere/Y.png
      Saved Image: MAPLEAF/Examples/V&V/NASADraglessSphere/Y.pdf
      Saved Image: MAPLEAF/Examples/V&V/NASADraglessSphere/X.png
      Saved Image: MAPLEAF/Examples/V&V/NASADraglessSphere/X.pdf
      Saved Image: MAPLEAF/Examples/V&V/NASADraglessSphere/Z.png
      Saved Image: MAPLEAF/Examples/V&V/NASADraglessSphere/Z.pdf
      Saved Image: MAPLEAF/Examples/V&V/NASADraglessSphere/YVel.png
      Saved Image: MAPLEAF/Examples/V&V/NASADraglessSphere/YVel.pdf
      Saved Image: MAPLEAF/Examples/V&V/NASADraglessSphere/ZVel.png
      Saved Image: MAPLEAF/Examples/V&V/NASADraglessSphere/ZVel.pdf

"""